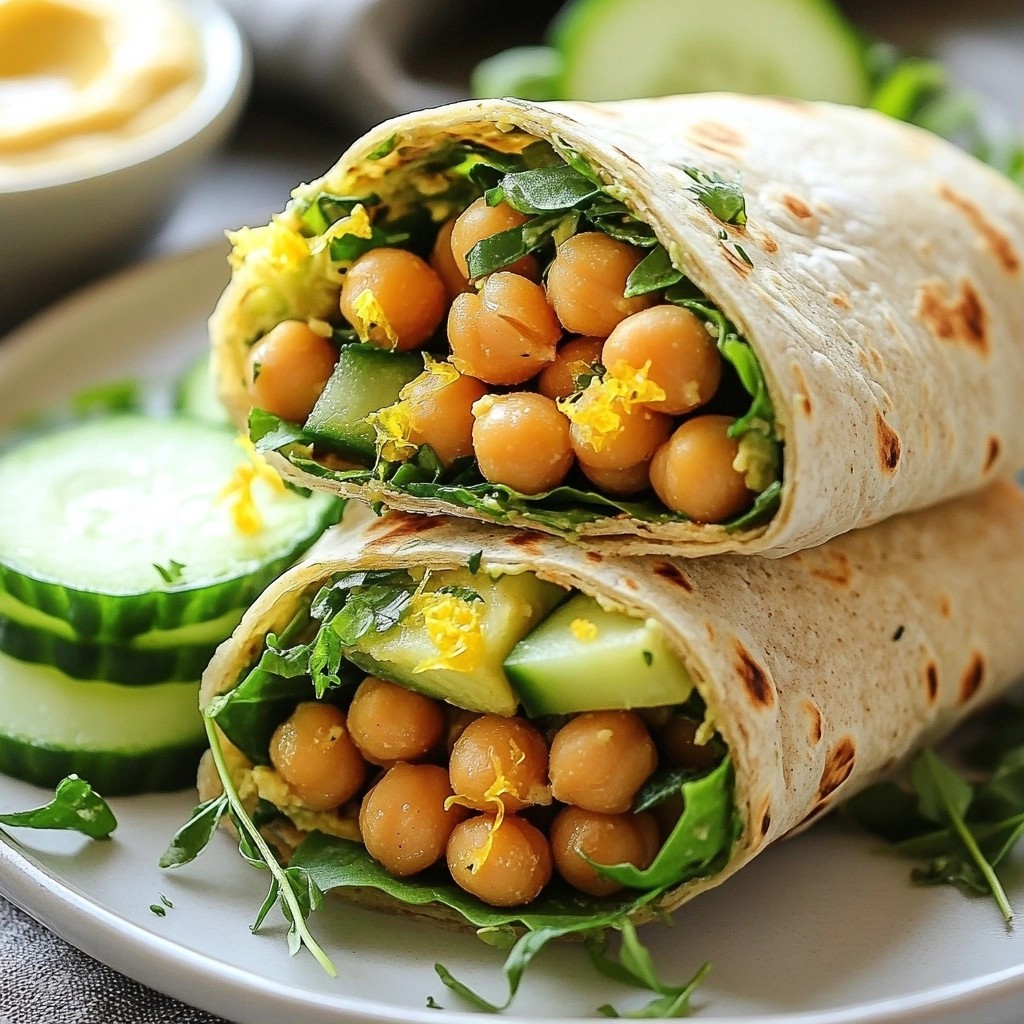
Looking for a quick and tasty lunch idea? You’ve found it! These Lemon Herb Chickpea Wraps are not only simple but also packed with flavor. Perfect for busy days, you can whip them up in no time. I'll guide you through easy steps to create these wraps, share helpful tips, and suggest fun variations. Let’s dive into a delicious meal that’ll brighten your lunch hour!
Why I Love This Recipe
- Quick and Easy: This recipe comes together in just 10 minutes, making it perfect for a busy weeknight dinner or a quick lunch.
- Healthy and Nutritious: Packed with protein from chickpeas and healthy fats from avocado, these wraps are a wholesome choice for any meal.
- Customizable: You can easily modify the ingredients to include your favorite veggies or swap out the herbs for a different flavor profile.
- Great for Meal Prep: These wraps hold up well, making them an excellent option for meal prepping for the week ahead.
Ingredients
Main Ingredients Needed
To make these easy lemon herb chickpea wraps, gather these key ingredients:
- 1 can (15 oz) chickpeas, drained and rinsed
- 2 tablespoons olive oil
- 1 teaspoon lemon zest
- 2 tablespoons lemon juice
- 1 teaspoon garlic powder
- 1 teaspoon dried oregano
- 1 teaspoon dried parsley
- Salt and pepper to taste
- 4 whole wheat or spinach tortillas
- 1 cup mixed greens (spinach, arugula, or lettuce)
- 1 medium cucumber, sliced
- 1 ripe avocado, sliced
Optional Ingredients for Extra Flavor
You can add more taste to your wraps with these options:
- Hummus for a creamy spread
- Tzatziki for a cool yogurt flavor
Ingredient Substitutions
If you don’t have some ingredients, try these swaps:
- Use canned white beans instead of chickpeas
- Swap olive oil for avocado oil
- Fresh herbs can replace dried ones for more flavor
- Any tortillas work; use corn or gluten-free if needed

Step-by-Step Instructions
Preparation of Chickpea Mixture
Start by draining and rinsing the chickpeas. This step removes excess salt and makes them clean. In a medium bowl, combine the chickpeas, olive oil, lemon zest, and lemon juice. Add garlic powder, oregano, parsley, salt, and pepper. Use a fork to mash the chickpeas slightly. Mix until the ingredients blend well but still stay chunky. This adds texture to the wraps.
Assembling the Wraps
Now, lay out your tortillas on a clean surface. If you want extra flavor, spread hummus or tzatziki on each tortilla. Divide the chickpea mixture evenly among the tortillas, placing it in the center. Next, add a handful of mixed greens, cucumber slices, and avocado slices on top of the chickpeas. To wrap, fold in the sides of the tortilla. Roll it from the bottom to the top, keeping the filling secure.
Serving Suggestions and Presentation
Serve the wraps right away for the best taste. You can also wrap them in parchment paper for later. Pair the wraps with a small bowl of hummus or tzatziki for dipping. For a pop of color, garnish with extra herbs or lemon wedges on the side. This makes your meal look fresh and inviting. Enjoy your easy lemon herb chickpea wraps!
Tips & Tricks
How to Perfect the Chickpea Mash
To get the best chickpea mash, start with canned chickpeas. Drain and rinse them well. Use a fork to mash them gently. You want a mix of smooth and chunky. This gives your wraps texture and flavor. Add olive oil, lemon juice, and spices right after mashing. This helps the flavors blend well. Taste and adjust salt and pepper as you go.
Best Tortilla Choices
For these wraps, I love whole wheat or spinach tortillas. They add a nice flavor and color. Whole wheat is healthy and filling. Spinach tortillas make the wraps pop with green. You can also try gluten-free tortillas if needed. Just ensure they are strong enough to hold the filling.
Enhancing Flavor with Spreads
Using spreads can take your wraps up a notch. I suggest hummus or tzatziki. Hummus adds creaminess and a slight garlic taste. Tzatziki offers a cool, refreshing bite. Spread a thin layer on each tortilla before adding the chickpea mix. It adds moisture and flavor. You can even mix in some herbs into these spreads. This will make your wraps even tastier!
Pro Tips
- Use Fresh Herbs: Fresh herbs can elevate the flavor of your wraps significantly. Try using fresh parsley or cilantro instead of dried herbs for a vibrant taste.
- Perfectly Ripe Avocado: Ensure your avocado is perfectly ripe for the best texture and flavor. A ripe avocado should yield slightly to pressure when squeezed.
- Chill Before Serving: If you have time, let the filled wraps chill in the fridge for about 30 minutes. This helps the flavors meld together and makes them easier to slice.
- Experiment with Fillings: Feel free to customize your wraps with additional fillings like roasted red peppers, shredded carrots, or even feta cheese for a twist on the classic recipe.
Variations
Customizing with Different Greens
You can change the greens in your wraps. Spinach, arugula, or lettuce all work well. If you want a crunch, try kale. Each green adds its own flavor and texture. Mixing greens can make your meal more colorful and tasty.
Adding Protein Sources
Want more protein? You can add grilled chicken or tofu. Cooked quinoa also works great. Simply layer it in with the chickpeas. This makes your wraps heartier and more filling. You can also use nuts or seeds for extra crunch and flavor.
Spicing It Up with Additional Herbs
Herbs can make your wraps pop with flavor. Try fresh basil or cilantro for a twist. Add a pinch of red pepper flakes if you like heat. You can also mix in some dill for a fresh taste. Experiment with herbs to find your favorite blend.
Storage Info
How to Store Leftover Wraps
Storing leftover wraps is easy. Place them in an airtight container. If you want to keep them fresh, wrap each one in parchment paper first. This keeps the tortillas from getting soggy. Store the container in the fridge. Enjoy your wraps within three days for the best taste.
Best Practices for Freezing
You can freeze these wraps for later. Wrap each one tightly in plastic wrap. Then, place them in a freezer-safe bag. Make sure to remove as much air as possible. They can last up to three months in the freezer. When you're ready to eat, just thaw them in the fridge overnight.
Reheating Instructions
To reheat your wraps, use a skillet or microwave. If using a skillet, heat it over medium heat. Place the wrap in the skillet for about two minutes on each side. This warms it through and keeps it crispy. For the microwave, heat on high for 30-45 seconds. Check if it’s warm enough before eating.
FAQs
What are the health benefits of chickpeas?
Chickpeas are small but mighty. They are high in protein and fiber. This helps keep you full longer. Eating chickpeas can also support heart health. They contain vitamins and minerals, like iron and folate. These nutrients boost your energy and support overall health. Plus, chickpeas are low in fat and can aid in weight management. Adding them to meals is a smart choice for health.
Can I make these wraps vegan?
Yes, you can easily make these wraps vegan! The main ingredients are already plant-based. Just skip any dairy spreads, like tzatziki. Use hummus as a spread instead. This will keep your wraps creamy and delicious. You can also add extra veggies for more flavor. Try adding bell peppers or carrots. They will enhance the taste without adding animal products.
How long do these wraps last in the fridge?
These wraps can last about 2 to 3 days in the fridge. Store them in an airtight container to keep them fresh. If you add avocado, it may brown faster. To slow this down, squeeze some lemon juice on it. This will help keep it looking bright. If you want to make them ahead, prepare the chickpea mix and store it separately. Assemble the wraps just before you eat them for the best taste.
Chickpea wraps are easy and tasty, perfect for lunch or a snack. We covered key ingredients, from main choices to fun extras. You learned to prepare, assemble, and serve them well. Tips on mashing, selecting tortillas, and the best spreads make this even better.
Explore variations to suit your taste. Don't forget about storage and reheating for leftovers. Enjoy these healthy flavors often!